This tutorial guides you through the process of adding certain UI elements to a Motion Template that are not, by default, available in Motion.
By the end of this tutorial, you will know how to add a banner graphic at the top of the parameter inspector to improve brand recognition and provide access to product documentation. You will be able to label related parameters by using section dividers, a substitute for the fact that Motion does not let developers create and publish parameter groups.
Banner graphics and section dividers can be added to any Motion Template hosted in a FxTemplates project by borrowing functionality from Introduction to FxPacks, the technology used to create native plug-ins in FxFactory.
Phase 1: Create an FxPack
Let us base an example on an existing FxTemplates-based product called "Goodies”, whose author is "ACME". In the FxFactory app, select File → New → Plug-Ins to create a new FxPack to host your native plug-ins:
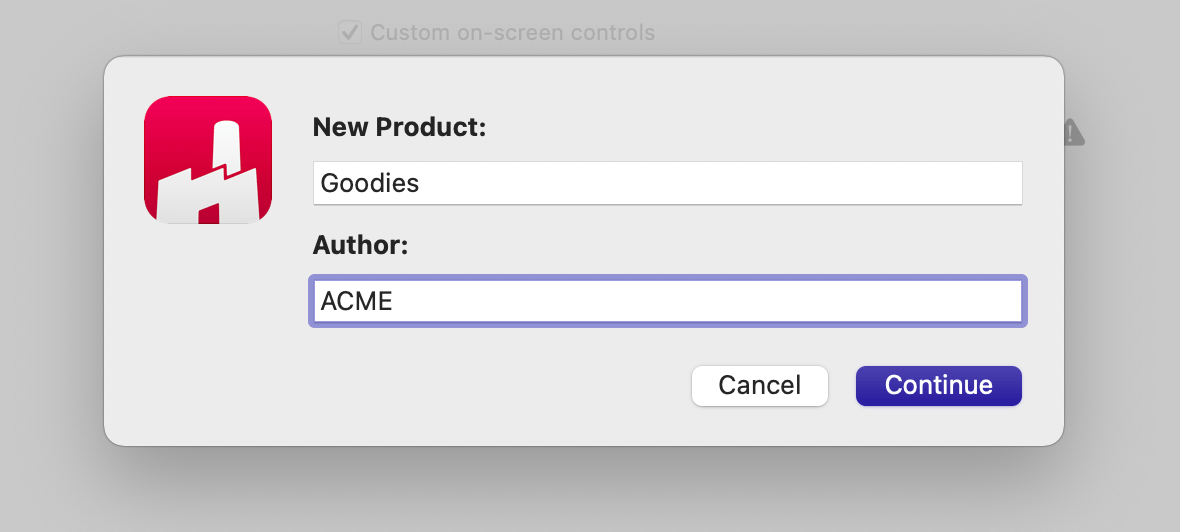
Click Continue to create the first plug-in in the FxPack.
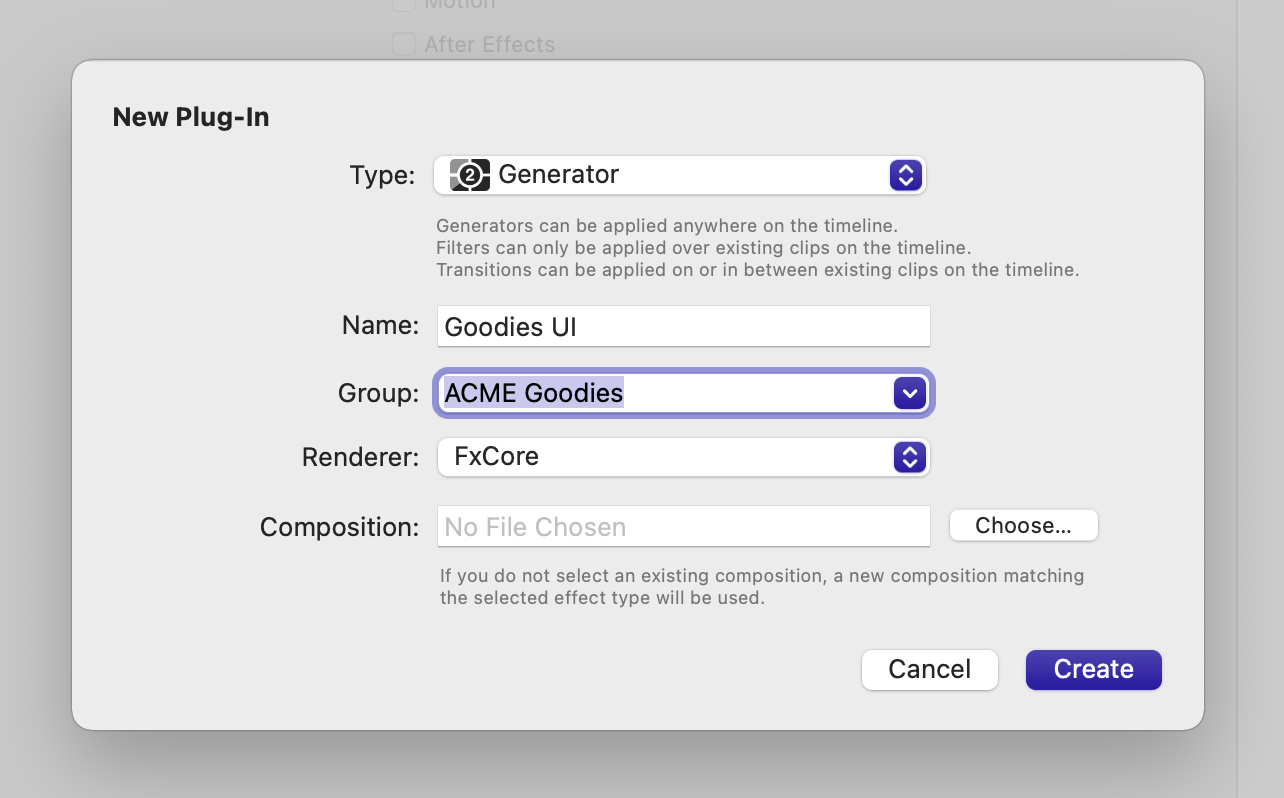
Leave the plugin type as Generator if you are only interested in using the native plug-in for custom UI. If you need to use this plug-in to host an object tracker too, set the effect type to Filter instead. Object tracking is only available to filter-type plug-ins.
Since the product name is "Goodies", name your new plug-in "Goodies UI" as a reminder that it will be used solely for the purpose of adding custom UI to your Motion Templates. In following other FxFactory conventions, set the plugin to appear under a category that is formed by the author, optionally followed by the product name, e.g. "ACME Goodies":
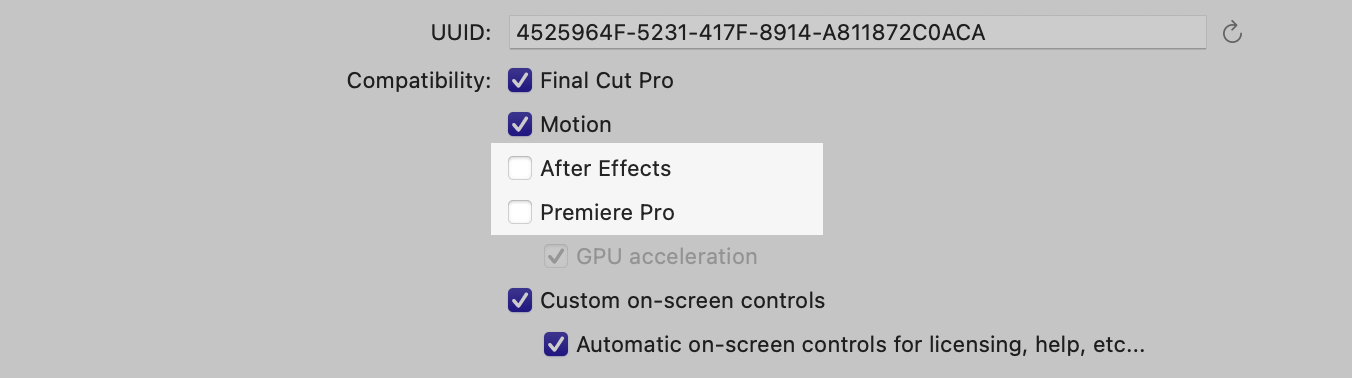
Since your new plug-in only needs to be accessible in Final Cut Pro and Motion, disallow loading in other hosts:
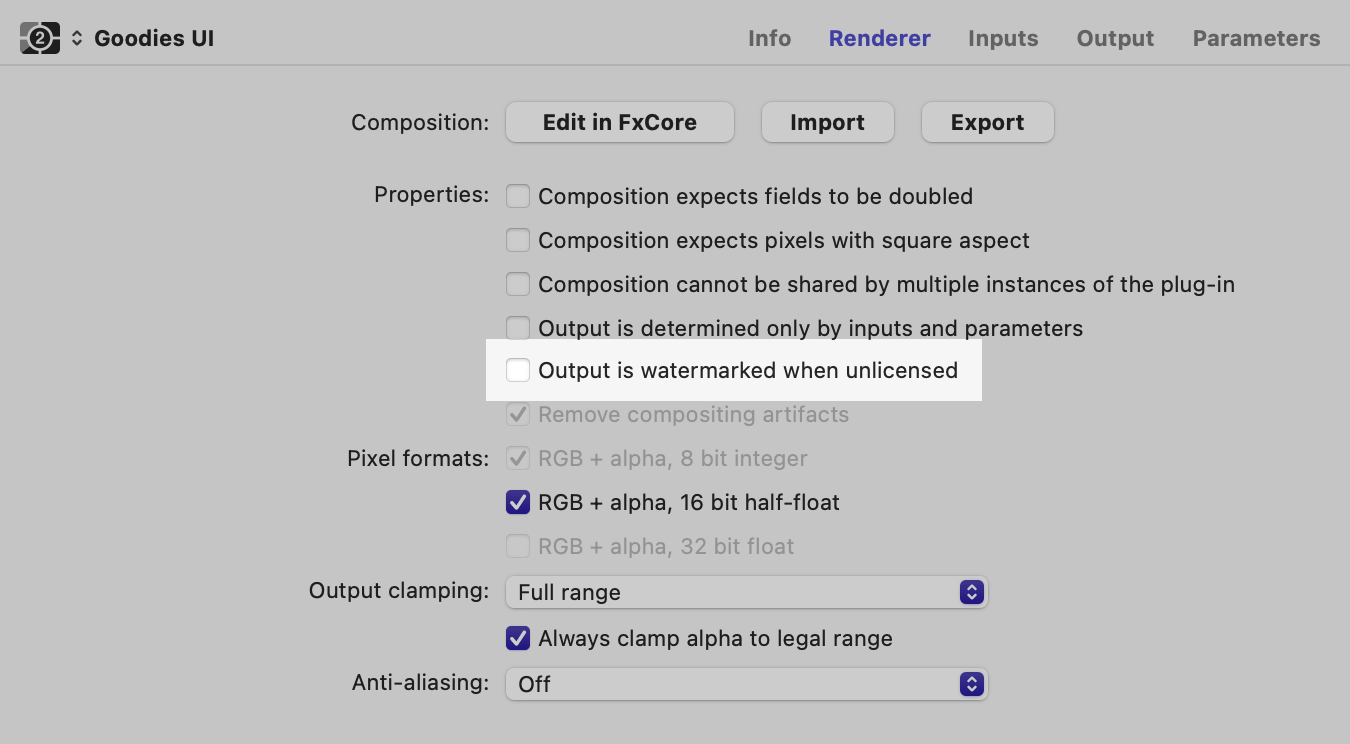
The output produced plug-in is going to be ignored, therefore it will not require a watermark. Turn off the corresponding option inside the Renderer section:
Product Configuration
The FxPack that hosts your custom UI plug-in is about to become the primary component in your product. Some of the information you originally entered in your FxTemplates project will now have to be entered agan in the FxPack. When a link is established between the FxPack and FxTemplates, it is said that they are bundled together. The bundling process makes the FxTemplates dependent on the FxPack. From that point forward, the FxTemplates project inherits a significant portion of its configuration from the FxPack.
The first step in configuring the FxPack as the primary component in the bundle is that it should use the same product icon you assigned to the FxTemplates. Add the graphic file to the product’s Assets section and switch to the Product section:
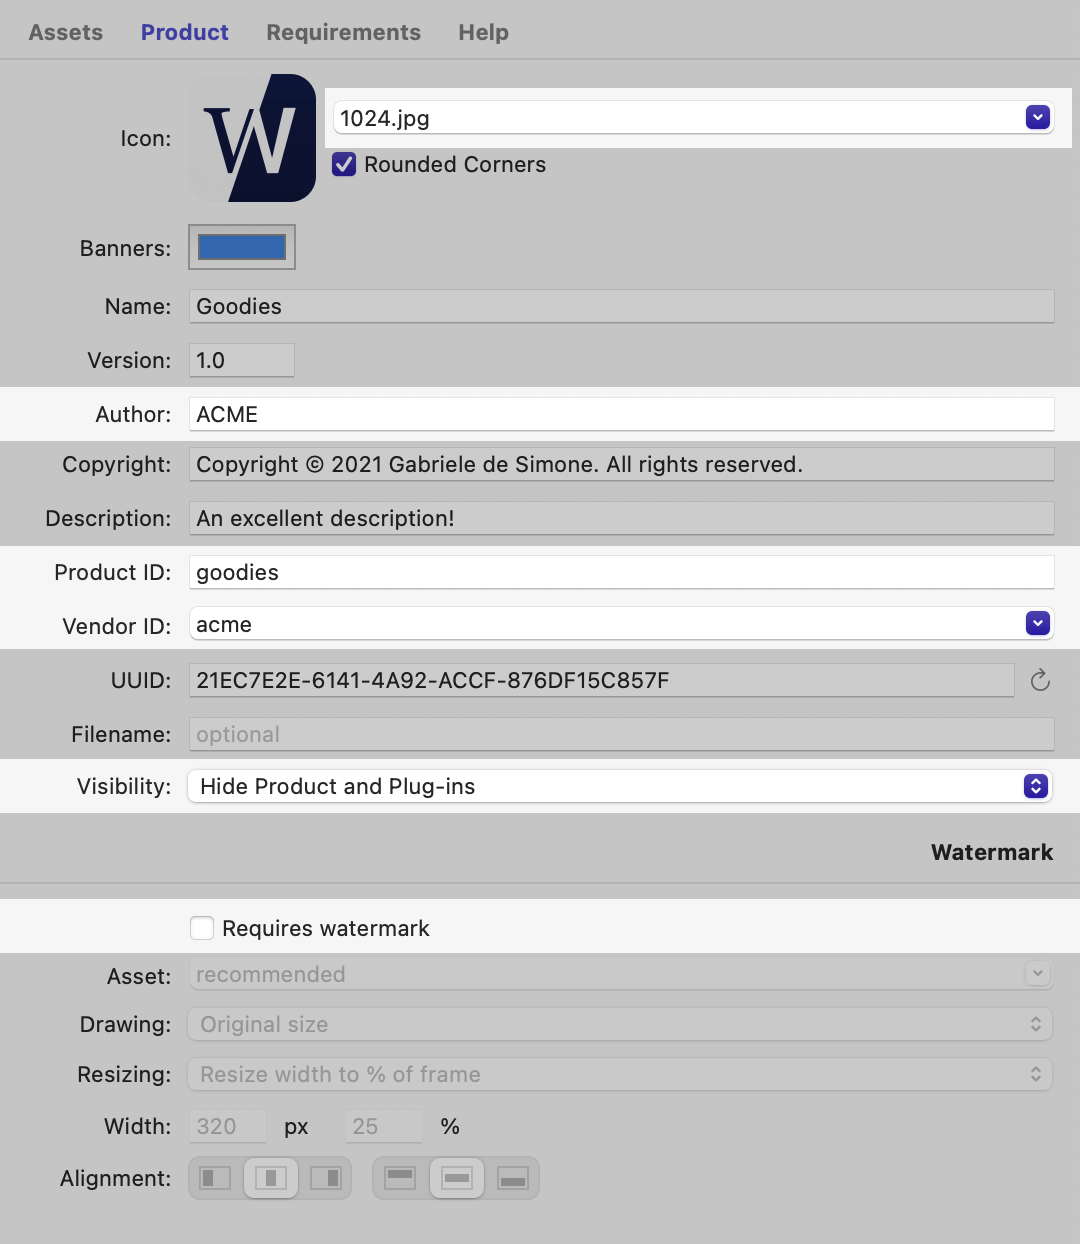
- Assign the product icon you just added to the Assets section
- Provide a product’s description, since the one found in the FxPack will become the one used for the product as a whole.
- Make sure the author, product ID and vendor ID match those you had supplied in the FxTemplates product.
- Switch the Visibility option to Hide Product and Plug-Ins. Since your FxPack is only useful in a supporting role to your Motion Templates, there is no reason users should be able to see the product or the custom UI plug-in when the commercial version is installed.
- Disable the Requires Watermark option, since the plug-in in the FxPack does not have any role in producing the output of your templates. Its role is simply to provide parameters that you can publish in order to populate the inspector with custom UI.
Requirements
Switch to the product Requirements section, and make sure its values match those in the FxTemplates. For example, if your FxTemplates product targets Final Cut Pro 10.6 the required minimum version of macOS should be 11.15.1:

Disable the "After Effects" and "Premiere Pro" options under the Requirements section, since this plugin will have no reason to be available inside those apps.
Phase 2: Adding Custom UI
Switch to the Parameters section of the plugin to begin building your custom UI:
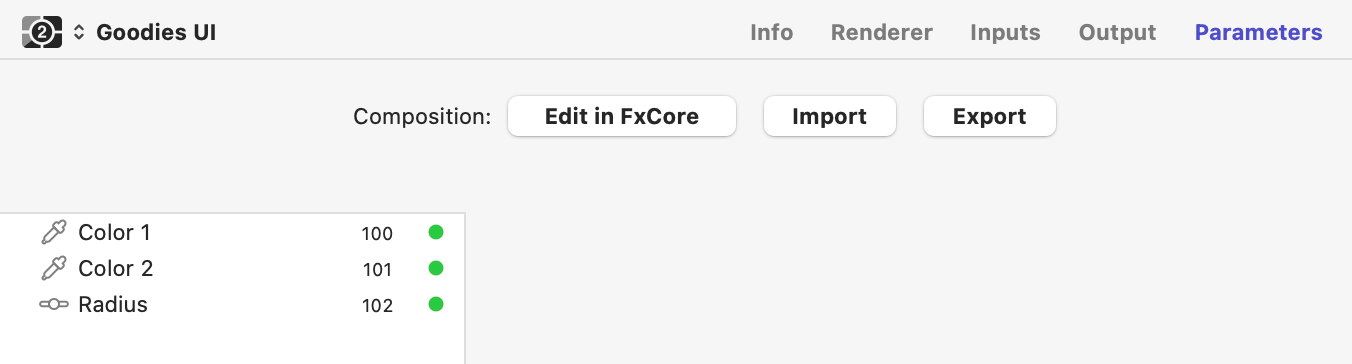
Notice that the default generator created by FxFactory comes with a few parameters. You will not need these parameters or the output of the generator, so your first step is to select and delete them:
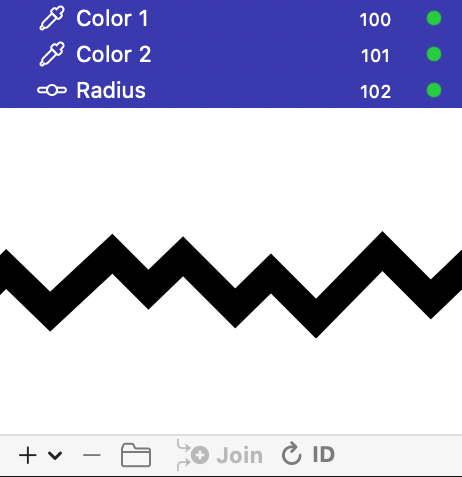
What about the composition?
A plug-in that is only used for its custom parameters does not need any rendering logic at all! So edit the composition and delete all nodes in the graph. When adding your custom UI plug-in inside each Motion Template, you will disable its layer to avoid paying any performance penalty at all. Why bother removing all nodes from a composition then? An empty composition uses less disk space than one with any content at all. It will load faster and make the resulting product leaner.
What if I need custom UI and an object tracker?
That topic is left to its own tutorial, but it does not make sense to delete all nodes in the composition if you are developing a filter plugin that is used both for custom UI and to provide an object tracker. FxFactory considers a filter to be valid only if required inputs are mapped. A filter is supposed to have a main image input. If the default filter input is not mapped because the composition lacks any suitable image inputs, the plugin will not be loaded by Motion or Final Cut Pro.
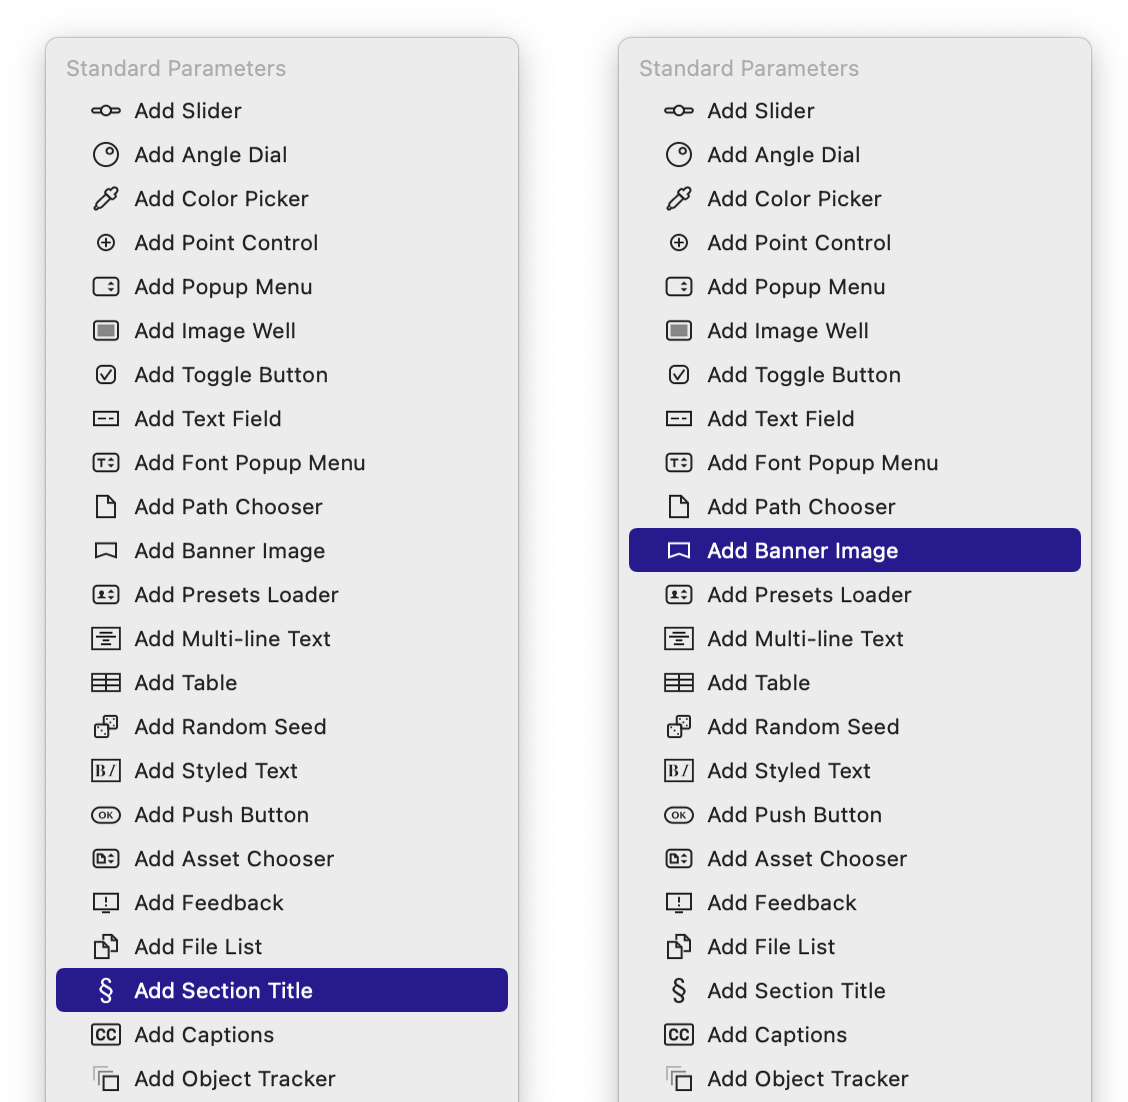
Next, add a banner and a section divider. Both parameter types are available under the + button below the parameter list:
Let’s configure the Banner parameter first, according to the most likely scenario:
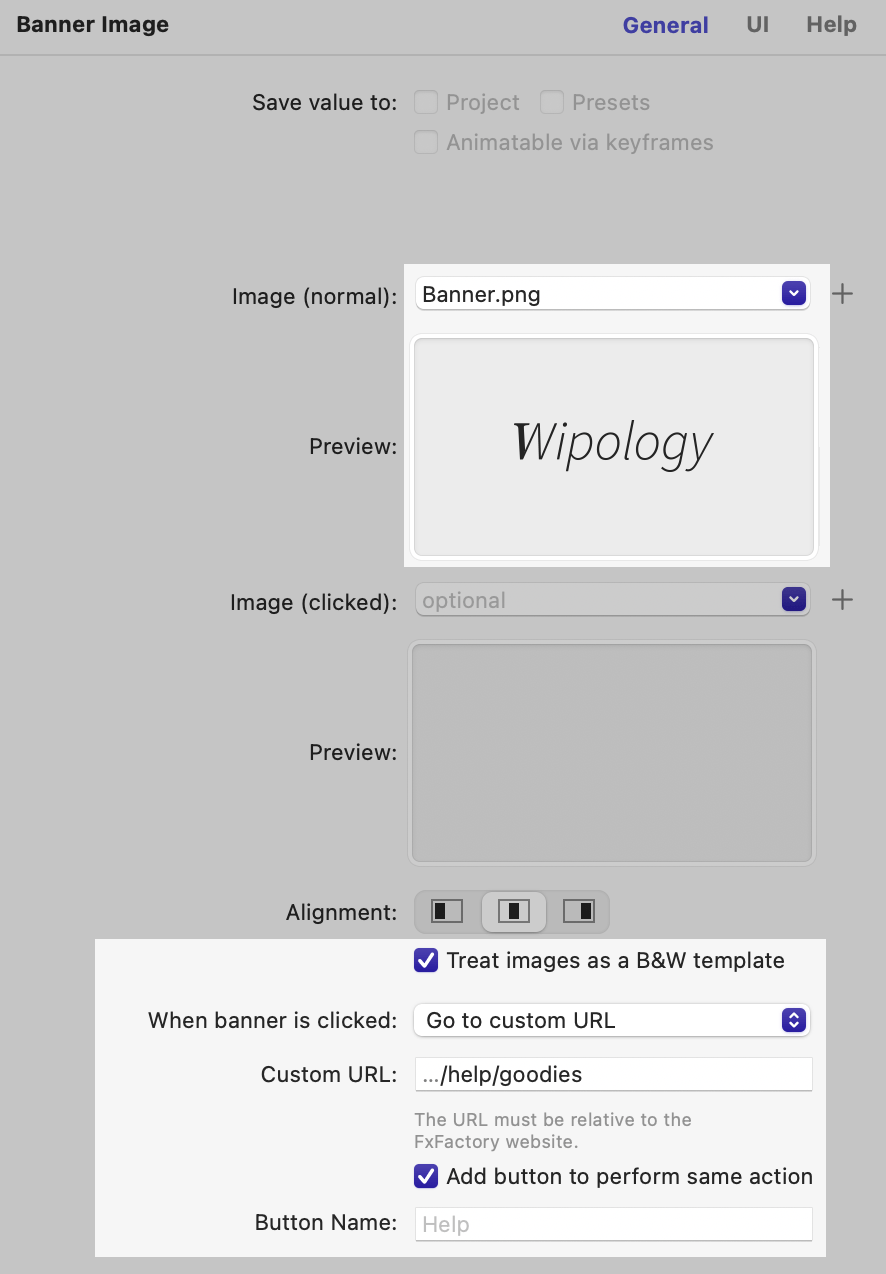
The most unintuitive aspect of a banner is its graphic. You can supply a colorful graphic if you wish, but the option that works best is to supply a black-only graphic with alpha and enable the Treat images as a B&W template option. This tells FxFactory to treat the image as a reference graphic, to be inverted when displayed in a dark UI. This behavior replicates functionality provided by the NSImage class, where instances can be designated as a template. This particular feature allows FxFactory to always display your banner correctly no matter how the host application is configured. Video apps have recently settled on dark UIs but not long ago it was possible to alter the appearance. Future versions may again give users that option.
Your banner graphic should look great on Retina (HiDPI) displays. Create the graphic as a PNG file at 144 DPI. Ensure its dimensions in pixels are twice the intended display dimensions in points. Banners should not be wider than 148 points, equivalent to 296 pixels at 144 DPI. This maximum width ensures the graphic remains fully visible when users have resized the parameter inspector to its minimum width. If your banner graphic is wider than 148 points, it may get cropped. The second unintuitive fact about banner parameters is that you do not need to supply a second graphic for the click state. By default, FxFactory will lighten or darken your graphic to indicate the pressed (clicked) state. You can supply a different graphic only if you wish to customize this behavior.
If you wish to link your banner to the product’s website or documentation, make it clickable and enable the Add button to perform the same action option. This tells FxFactory to display a Help button to the side of the graphic. The button makes it obvious to users that the banner is more than cosmetic. Users can click either the graphic or the button to access the product’s website or documentation.
Multiple options are available to provide help for your product. Banner parameters can be linked to documentation generated automatically, to an embedded asset or to an external website. When choosing to link your banner to a website, please use the Custom URL option and enter a relative link based on the word “help” and your product’s ID, for example .../help/goodies. We take care of managing a redirector on our website that links that address to any page on your website. You can certainly create more than one banner graphic, but if you are looking for a better way to organize parameters in the inspector, Section Title parameters are a better choice.
Select the lone Section Title parameter you created earlier to view its options:
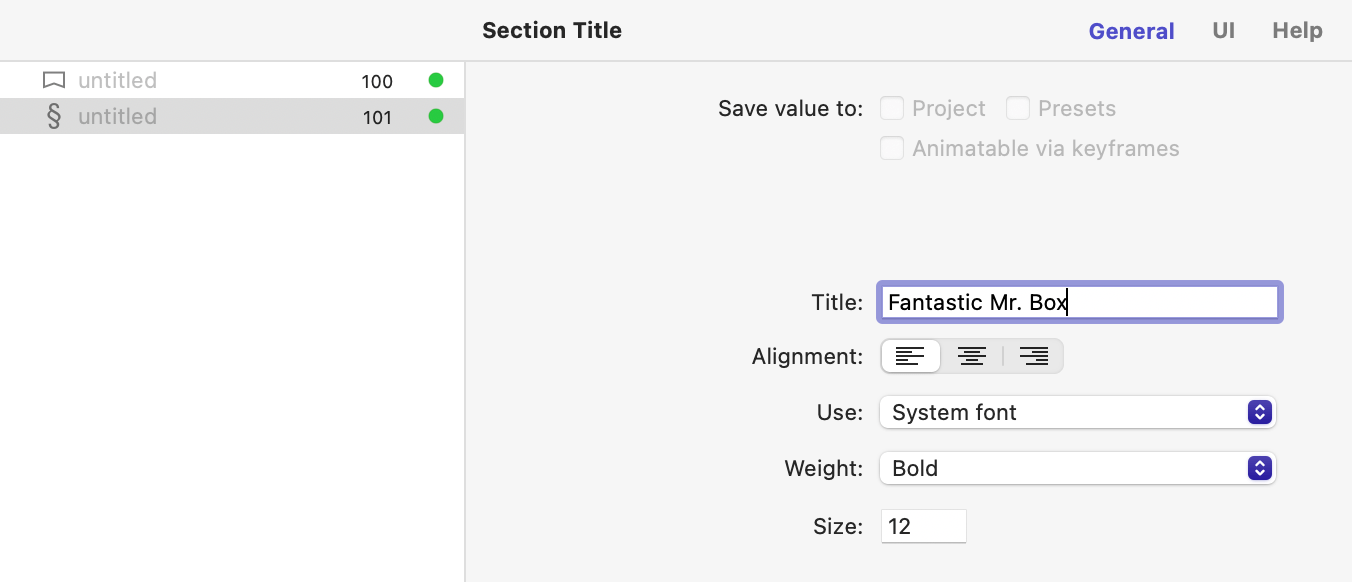
Strictly speaking, there is only a single important option to configure: the text displayed in the inspector. You can customize font, size and alignment of the title with a few caveats:
- The system font is usually the better choice as it matches the UI in most host apps. This is especially true of Final Cut Pro.
- If you select a different font, make sure it is included on all versions of macOS supported by your product.
- You can simply enter a space to create a section title that renders no text, i.e. a spacer. Tweak the font size to increase the vertical gap created by this spacer.
Create as many Section Title parameters as you need in all your Motion Templates. For example, if your templates contain parameters that affect Geometry and Background, create two Section Title parameters with those titles to be used in the effect UI.When you are satisfied with the parameters created in the native plugin, save the product. At this point you may launch Motion to test the generator. If you add it to your timeline and switch to the parameter inspector, you will notice the banner and section title parameters you just created! These are now available to your Motion Templates for publishing, but there are a few more steps to wrap up this process.
Phase 3: Bundling FxPack and FxTemplates
FxFactory must be told that the FxPack we just created is linked to the FxTemplates project that contains your Motion Templates. Once bundled together, the two components become one product.
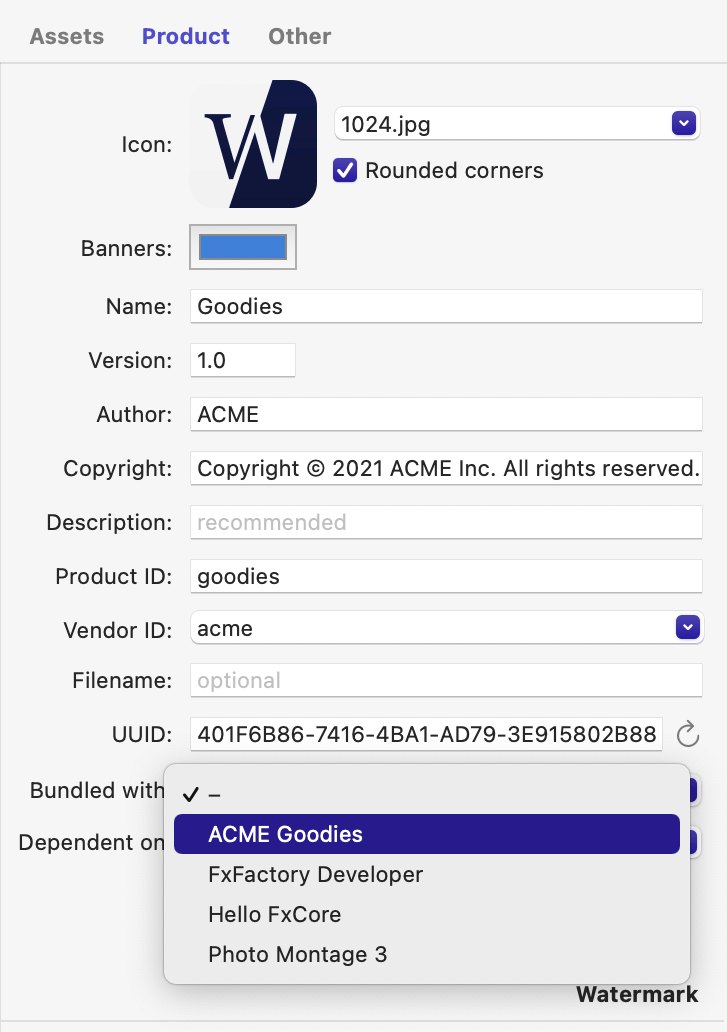
Open the FxTemplates project and switch to the Product section. Under the Bundled with popup menu, select the name of the product you assigned in Phase 2 (“ACME Goodies" in our example). Notice that certain options in the UI will become grayed out as a result:
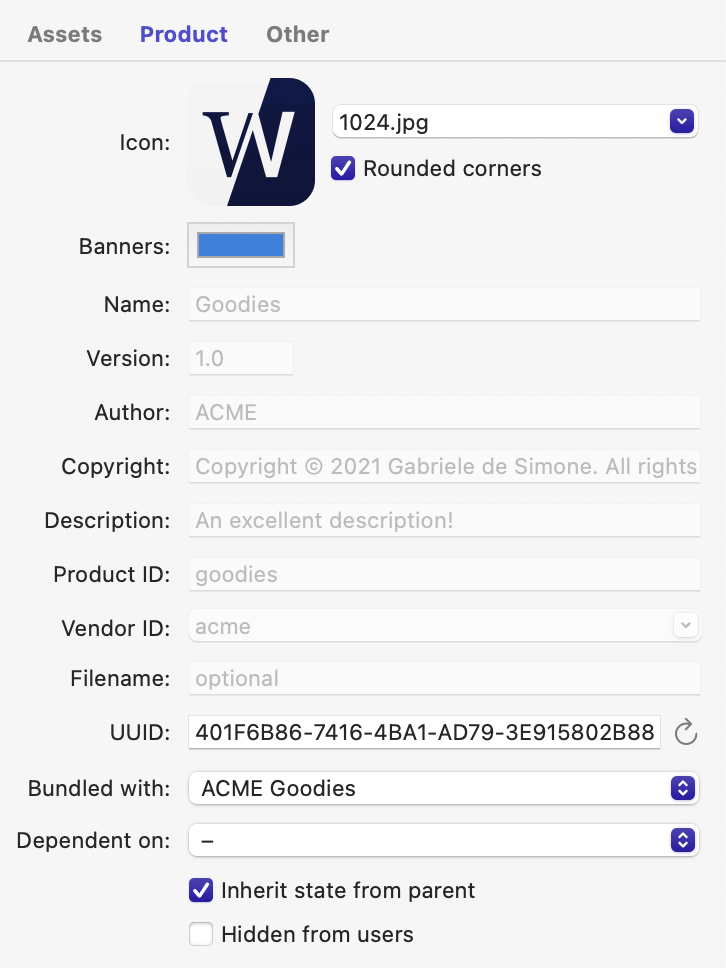
The reason you will no longer be able to edit certain values is that they are now inherited from the parent product, the FxPack. It makes sense that all components in a product should share certain information. If you ever need to change product info, follow these steps:
- Open the FxPack
- Switch to the Product section
- Update product information. The corresponding data entry fields remain enabled since this is the parent product in the bundle.
- Save and close the FxPack
- Open the FxTempaltes
- When prompted, allow FxFactory to migrate your recent changes from the parent product to the FxTemplates
How do product bundles affect the user experience?
Bundling FxPack and FxTemplates together does not change how you – the developer - can browse and access each component. You will continue to see two separate icons in FxFactory. Each component remains editable, through as mentioned earlier, some information under the Product section can now be modified only in the parent component of your bundle.
The situation is quite different when installing the commercial version of your product. Users only see one product icon. FxFactory automatically merges product information and requirements from various components of your bundle into a single, coherent display.
All components of a bundle must always be installed on the system for it to work. If you install one without the other, or if you mix and match editable and commercial versions, you risk losing data.
Phase 4: Adding Your Custom UI to the FxTemplates
With both editable versions of your FxPack and the FxTemplates installed, it is finally time to add your custom UI to the Motion Templates. If Motion is currently running on your system, restart the app to give it a chance to load your new plug-in. Next, click the Edit in Motion button next to the first Motion Template you wish to enhance.
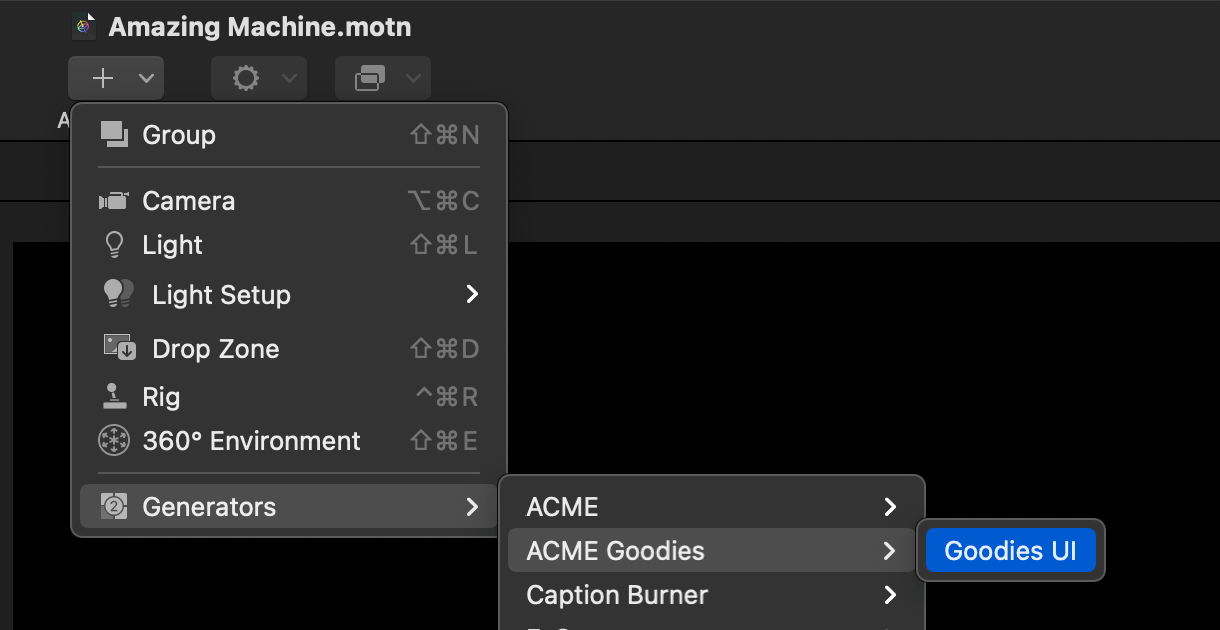
When Motion opens your template, locate the new generator under ACME Goodies → Goodies UI:
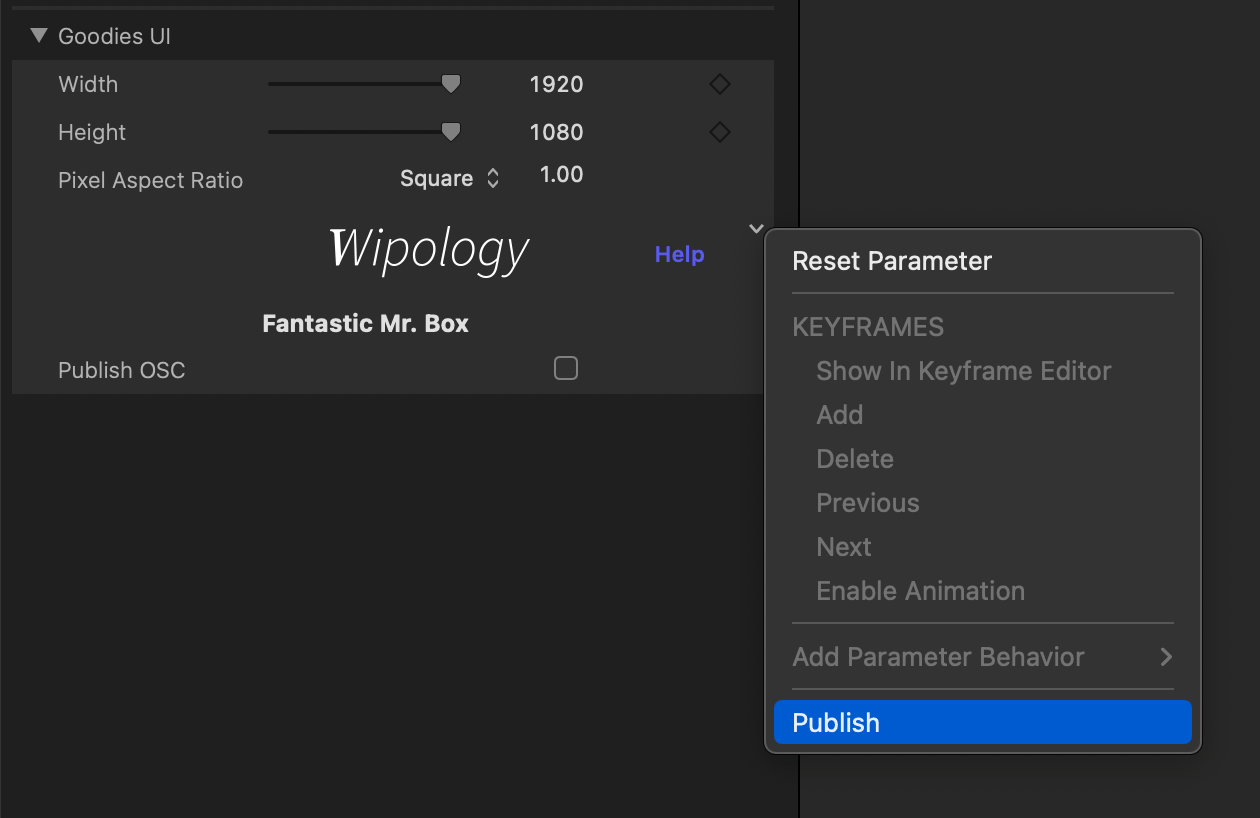
Add it to your timeline and switch to the parameter inspector. Notice that you can publish the banner and section title parameters created earlier, in the FxPack:
Enhance the UI of your Motion Template with banners and dividers as you please, but one last step is required to wrap things up: there is no reason the custom UI plug-in should rendering anything. Disable the plug-in’s layer:
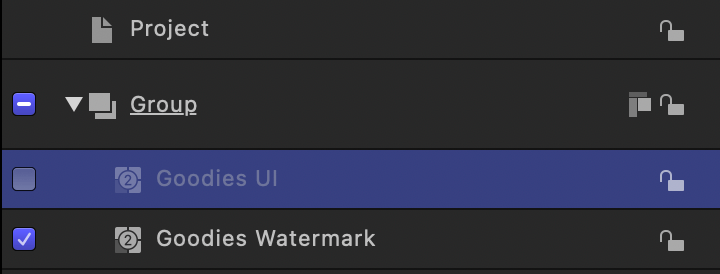
Leave the Watermark layer untouched, since your product will continue to require a watermark when unlicensed.
Even when its layer is disabled, the published parameters are still available and functional. No performance penalty is incurred by having Motion load and render the composition. Win-win!
If you wish to make changes to the custom UI, such as adding new banners or section titles:
- Quit Motion
- Edit the FxPack
- Select the custom UI plugin
- Add new parameters and/or configure its existing parameters.
- Save the FxPack
- Edit the FxTemplates
- Edit any Motion Templates where you wish to publish more custom UI
Remember that a parameter can only be published once. If you need multiple section dividers in your Motion Templates, make sure that you create as many in the FxPack.
This concludes the portion of this process developers can complete on their own. We perform additional configuration of your product when turning the editable product into a commercial one.