Parameters
Presets
Presets contain a snapshot of your effect configuration. 14 built-in presets are available.
When you save parameter configuration to a file on disk, this file can later be loaded to recreate the same effect configuration. Presets generated in one video application can be used by the same plug-in running in a different video application.
How do I use the presets popup menu?Object Tracking
Track
Lets you track up to 8 objects in your video. When object tracking is complete, keyframes that follow the motion of the objects over time are automatically created.
The object tracker can be controlled on-screen in Final Cut Pro and Motion:


For more information on how to display on-screen controls in the Canvas:
Displaying on-screen controlsObjects can be tracked forward or backward relative to the current playhead location in your timeline. In most cases, you will want to position the playhead at the start of the clip:

Make sure the desired number of objects is selected under the Track menu to prepare for tracking:
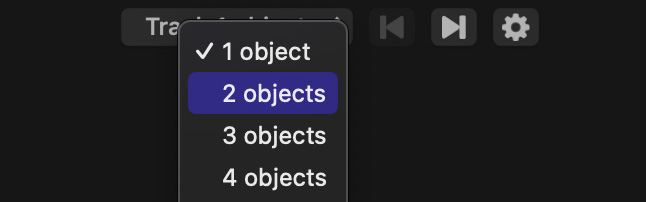
Position and resize the region around the object to be tracked:

Click the Track Forward button to begin analysis:

A window reports progress made so far:

Click the button if you notice that the analysis seems to be following an object incorrectly. Reposition and resize the region before attempting to track the same object again.
When the analysis is complete, keyframes are created to follow the objects along their path.
The analysis proceeds in the background even if you click on a different window. You can check on the progress of your analysis by selecting the Track command under the menu. If the command is missing from the menu, analysis is already complete.
How can I make my own adjustments to the results?
When object tracking analysis is complete, the rectangular selection around each tracked object follows the object along its detected path.
Make sure the on-screen controls are currently visible in the Canvas in order to see and manipulate the region around each tracked object. Note that each video application has different rules for when on-screen controls are visible in the Canvas.
As you step forward or backward by a single frame, you may drag the region to the desired location. If the motion path seems to wander off by a significant amount, you can click the Track Forward or Track Backward buttons to restart the analysis after applying the desired corrections.
You may also step through all frames where the analysis did a poor job of tracking the object, and manually reposition the region to match the actual location of the object. This gives you the flexibility to use automatic object tracking to estimate a motion path, while making fine-grained adjustments for the perfect results.
What if my object moves towards or away from the camera?
Under the options menu, enable the tracking of both position and scale:

This option allows the tracked region to expand when the object moves closer to the camera, and shrink when the object moves away. Please note that this functionality works best with objects whose contour is clearly defined relative to the background.
Remember to track the object again after changing this option.
Better tracking of shaky video
Results of the object tracker depend heavily on the video being analyzed. When tracking objects in shaky video, increase the Smoothing level to prevent the resulting motion path from shaking along with the object. The current smoothing level is set through the options menu:
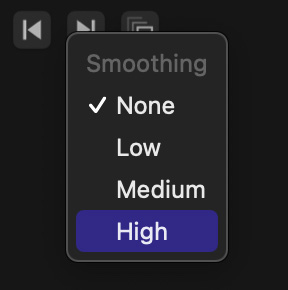
Remember to track the object again after changing the Smoothing level.
Better performance in Final Cut Pro
To speed up object tracking analysis in Final Cut Pro, transcode all clips to create Optimized Media.
Invert
Off by default.
When enabled, the effect is applied to the area around faces rather than to the faces themselves.
This parameter turns the plug-in from a tool that helps you conceal faces into a vignette filter.
When Invert is on, the plug-in turns from a tool that helps you conceal faces into a vignette filter.
Effect
Effect
The following options are available:
Style
The following options are available:
Amount
Set to 10% by default.
Exposure
Set to 0 by default. Only values between -1 and 1 are allowed.
Shape
Shape
The following options are available:
Custom graphic
Reads an image file from the given location.
What image formats does this plugin support?Lets you select a custom graphic that should be used as the mask for the effect.
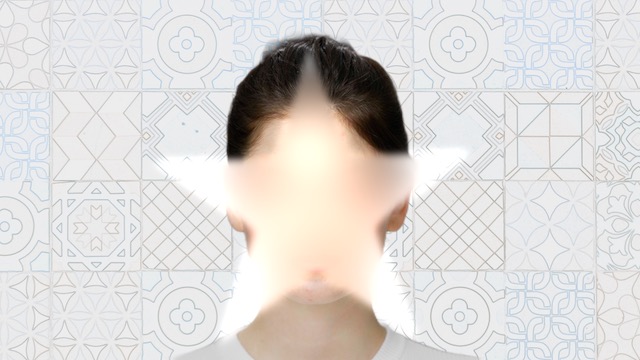
This parameter supports all popular image file formats. The file should contain a black and white representation of your mask:

White pixels indicate areas the effect should be applied to:
Feather
Set to 0 by default. Only values between -1 and 1 are allowed.
Offset X
Set to 0 by default. Only values between -5 and 5 are allowed.
Allows you to offset the shape horizontally, relative to the location and size of each face.
Because the offset is expressed in relative terms, the results remain consistent as the faces move towards or away from the camera.
Offset Y
Set to 0 by default. Only values between -5 and 5 are allowed.
Allows you to offset the shape vertically, relative to the location and size of each face.
Because the offset is expressed in relative terms, the results remain consistent as the faces move towards or away from the camera.
Angle
Set to 0° by default.
Allows you to rotate the mask shape relative to the face.
The natural tilt of each face is automatically detected. This parameter is designed to let you make some corrections when the automatic process has not been able to determine the tilt accurately.
Scale
Set to 1 by default. Only values between 0 and 2 are allowed.
Scales the shape proportionally, relative to the location and size of each face.
Because the scale is expressed in relative terms, the results remain consistent as the faces move towards or away from the camera.
Scale X
Set to 1 by default. Only values between 0 and 2 are allowed.
Scales the shape horizontally, relative to the location and size of each face.
Because the scale is expressed in relative terms, the results remain consistent as the faces move towards or away from the camera.
Scale Y
Set to 1 by default. Only values between 0 and 2 are allowed.
Scales the shape vertically, relative to the location and size of each face.
Because the scale is expressed in relative terms, the results remain consistent as the faces move towards or away from the camera.