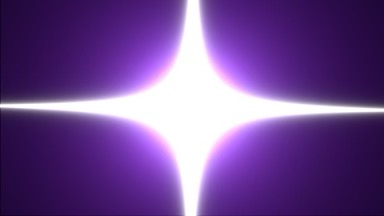
Star Shine
Compatibility
Star Shine is compatible with Final Cut Pro, Motion, Premiere Pro and After Effects.

Star Shine is compatible with Final Cut Pro, Motion, Premiere Pro and After Effects.
Presets contain a snapshot of your effect configuration. 9 built-in presets are available.
When you save parameter configuration to a file on disk, this file can later be loaded to recreate the same effect configuration. Presets generated in one video application can be used by the same plug-in running in a different video application.
Working with the Presets MenuSet to 25% by default.
A point parameter centered in the frame by default.
While it is possible to change the X and Y coordinates via the inspector, it is far easier to interact with point parameters directly on-screen:
Adjusting Point Parameters in Final Cut ProTurn on to animate the Star parameter.
Turn on to animate the Center parameter.
Turn on to animate the Angle parameter.
Turn on to animate the Color parameter.
Turn on to animate the Ray Length parameter.
Turn on to animate the Ray Thickness parameter.
Turn on to animate the Ray Strength parameter.
Turn on to animate the Ray Fade parameter.
A number that controls random aspects of the effect.
Click the button to assign a new seed value. When the seed value is changed, the effect uses a different random sequence to produce a different output.
Enables motion blur at different quality settings. The higher the quality, the more samples are used. Multiple samples are blended together to produce a single frame of output.
The Shutter Angle slider controls the size (aperture) of the shutter used to simulate motion blur. The size of the shutter determines how long light is allowed to pass through the lens. The angle is set to 180° by default. A shutter angle of 360° means that samples are collected for the entire duration of the frame.
Setting a value of zero means that you want the shutter to collect light only once, which is equivalent to turning motion blur off.
The Shutter Offset slider controls the moment in time when the shutter opens and closes, relative to the duration of the frame. The offset is set to 0 by default. An offset of zero means the shutter is perfectly centered over the moment in time when the frame occurs. The shutter is therefore open an equal amount of time before and after the current frame occurs.
The Shutter Angle and Shutter Offset parameters are only available when motion blur is enabled.